If you have ever had a bead leak on your ATV tire, you know how frustrating it can be. The good news is that there are a few things you can do to fix it.
If you have an ATV with bead leaks, there are a few things you can do to fix the issue. The first and foremost thing you need to do is find the leak. This can be done by inspecting the tire for any cracks or holes. If you find a hole, you will need to patch it up.
If you find a crack, you will need to seal it up. Once you have found the leak, you will need to determine the cause. If the cause is a puncture, you will need to patch the hole. If the cause is a crack, you will need to seal the crack.
Patching a hole is relatively simple. You will need a patch kit, some sandpaper, and some vulcanizing cement. Start by cleaning the area around the hole with sandpaper. This will help the patch kit adhere to the tire. After this, apply the vulcanizing cement to the hole. This will create a barrier between the hole and the air. Then, apply the patch to the hole.
Sealing a crack is a little more difficult. You will need a tube of vulcanizing cement and some sandpaper. Start by cleaning the area around the crack with sandpaper. Apply the vulcanizing cement to the crack. This will fill the crack and prevent air from escaping. Then, apply a layer of sandpaper over the cement. This will help the cement to cure properly.
After you have addressed the issue, you will need to re-inflate the tire. This can be done with a hand pump or an air compressor. Make sure the tire is inflated to the proper pressure.
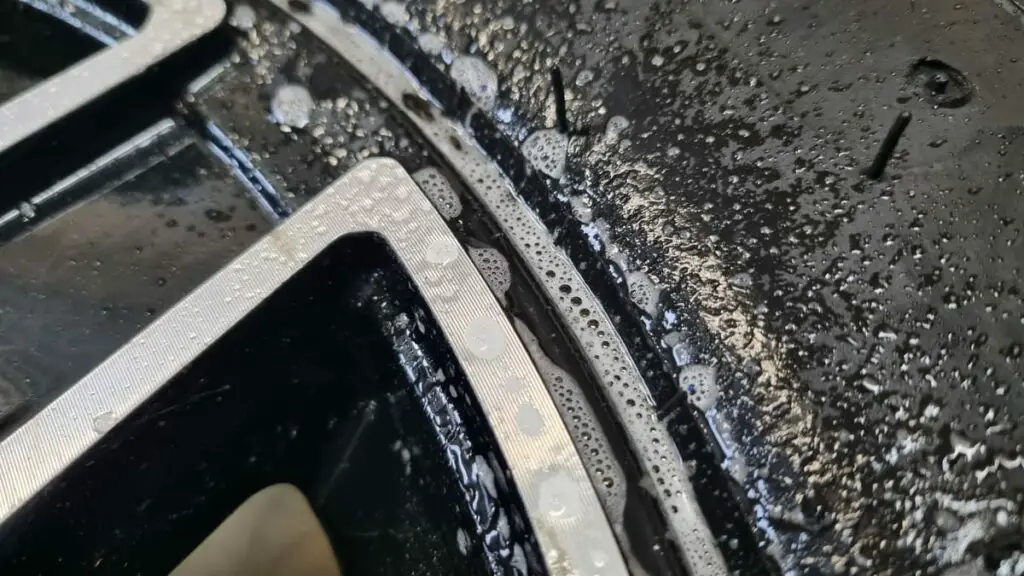
You will need to check for leaks once the tire is inflated. You can do this by submerging the tire in water. If you see bubbles, you have a leak. You will need to address the issue before you can continue using the tire.
This technique will help you with How to Fix a Bead Leak on an ATV Tire.
Reasons for Bead Leak on ATV Tire
Bead leaks are one of the most common problems that can occur with ATV tires. There are a number of reasons why this might happen, and it is important to be aware of them so you can avoid the problem in the future;
- The first reason why bead leaks might occur is because of the way the tire is mounted on the wheel. If the tire is not mounted properly, it can cause the bead to come loose and eventually lead to a leak. Make sure that the tire is mounted correctly and that the bead is seated properly before you start using the ATV.
- A reason for bead leaks is because of the way the tire is inflated. If the tire is inflated too much, it can cause the bead to come loose. Make sure that you follow the manufacturer’s recommendations for inflating the tire.
- Bead leaks can also occur because of the way the tire is used. If you are using the ATV in an area that is full of rocks or other debris, it can cause the bead to come loose. Be sure to avoid these areas when you are using the ATV.
If you do find yourself with a bead leak, there are a few things you can do to fix it. The first thing you should do is check the tire pressure. If the pressure is too low, it can cause the bead to come loose.
If the pressure is fine, then you should check the wheel for any damage. If there is any damage to the wheel, it can cause the bead to come loose.
If you cannot find the cause of the bead leak, you can always take the ATV to a mechanic. They will be able to take a look at the ATV and determine what is causing the problem.
Disadvantages of Having a Leaky Tire Bead
Leaky tires are one of the most frustrating problems a driver can face. A leaky tire bead is when the inner lip of the tire bead is not seated properly against the wheel. This can cause air to leak out of the tire, which leads to a loss of tire pressure. In some cases, a leaky tire bead can also cause the tire to come off the wheel entirely.
There are a few different ways that a leaky tire bead can occur. The most common cause is improper installation. If the bead is not seated correctly, it can cause an air leak. In addition, if the bead is damaged or worn, it can also cause a leak.
- One of the biggest disadvantages of having a leaky tire bead is the loss of tire pressure. This can lead to a decrease in fuel economy and a decrease in traction. In addition, it can also make the tire more susceptible to punctures and flats.
- A disadvantage of having a leaky tire bead is the risk of the tire coming off the wheel. This can happen if the bead is not seated properly or if it is damaged. If the tire comes off the wheel, it can cause serious damage to the car and even to the driver.
There are a few things that you can do to prevent a leaky tire bead:
- Make sure that the bead is properly seated.
- Check the bead regularly for damage or wear.
- If you have a puncture, use a tire plug or patch to repair the hole.
If you have a leaky tire bead, it is important to get it fixed as soon as possible. If you wait too long, the problem can get worse and you may end up having to replace the tire.
Prevention of Bead Leaks on ATV Tires
Bead leaks are one of the most common problems with ATV tires. If not properly sealed, air can escape from the tire, causing the tire to lose its shape and eventually go flat. If you have ever had a flat tire, you know how frustrating and dangerous it can be. Not only do you have to replace the tire, but you also have to deal with the hassle and expense of having your vehicle towed.
Fortunately, there are a few things you can do to prevent bead leaks on your ATV tires. Read on to learn more.
1. Check the Tire Pressure Regularly
One of the best ways to prevent bead leaks is to check the tire pressure regularly. Most ATV tires have a recommended pressure range, so be sure to check your tires regularly to make sure they are within that range. If you notice that your tires are starting to look low, inflate them to the recommended pressure.
2. Inspect the Wheels and Rims
A way to prevent bead leaks is to inspect the wheels and rims regularly. Look for any cracks, dents, or other damage that could allow air to escape. If you find any damage, have the wheel repaired or replaced as soon as possible.
3. Use a Bead Sealer
A bead sealer is a unique compound that helps to seal the bead of the tire to the wheel. This can help to prevent air from escaping and eventually causing a flat tire. Bead sealers are available at most auto parts stores.
4. Avoid Driving Over Sharp Objects
One of the leading causes of bead leaks is driving over sharp objects. If you can avoid driving over things like nails, glass, or other sharp objects, you will greatly reduce the risk of a bead leak.
5. Check for Leaks Regularly
Even if you take all of the above precautions, it is still a good idea to check for leaks regularly. The best way to do this is to use a tire pressure gauge. Every time you check your tire pressure, also check for leaks. If you find a leak, take your vehicle to a mechanic or tire shop to have it repaired.
By following these tips, you can help to prevent bead leaks on your ATV tires. Keep your tires properly inflated, inspect your wheels and rims regularly, and use a bead sealer to help seal the bead of the tire. If you do all of these things, you will greatly reduce the risk of having a flat tire.
Fixing a Bead Leak on an ATV Tire
We all know how frustrating it is to have a bead leak on our ATV tires. It is even more frustrating when we cannot seem to figure out how to fix it.
There are a few things that can cause a bead leak on an ATV tire. The most common cause is a tire that is not properly seated on the rim. This can happen if the tire is not inflated properly, or if the bead is damaged.
It can also happen because a bead leak is a rim that is not properly aligned with the tire. This can happen if the rim is bent or if the tire is not properly inflated.
If you suspect that your bead leak is due to one of these two causes, the first thing you should do is check the tire pressure. If the tire is properly inflated, the bead should seat properly on the rim. If the tire is not properly inflated, you will need to add air to the tire until the bead seats are properly on the rim.
Once you have checked the tire pressure and made sure that the bead is properly seated on the rim, you can now start to look for the source of the leak. If the leak is coming from the tire, you will need to remove the tire and inspect the bead. If the bead is damaged, you will need to replace the tire. If the bead is not damaged, you can try to repair the leak.
If the leak is coming from the rim, you will need to remove the rim and inspect it for damage. If the rim is damaged, you will need to replace it. If the rim is not damaged, you can try to repair the leak.
After you have found the source of the leak, you can now start to repair the leak. If the leak is coming from the tire, you can try to patch the hole in the tire. If the leak is coming from the rim, you can try to weld the hole in the rim.
If you are not able to repair the leak, you will need to replace the tire or the rim.
Related: How to Drive an ATV?
Read also: How many miles will a Polaris Ranger last?
FAQs
Q: Can a Leaky Tire Bead be fixed?
A leaky tire bead can be a real pain. It can cause your tire to lose air, and it can be dangerous if you are driving on a flat tire. But, there is good news! A leaky tire bead can be fixed, and it is not as difficult as you might think.
There are a few things you will need in order to fix a leaky tire bead:
- A tire patch kit
- A tire iron
- A jack
1. You will need to remove the tire from the car. You can do this by using a jack to lift the car up, then using the tire iron to loosen the lug nuts. Once the lug nuts are loose, you can remove the tire from the car.
2. You will need to find the leak in the tire. The best way to do this is to inflate the tire and then submerge it in a tub of water. The leak will show itself as a stream of bubbles.
Once you have found the leak, it is time to patch it up. Most tire patch kits will come with instructions on how to do this. Basically, you will need to clean the area around the leak, then apply the patch according to the instructions.
After the patch is applied, you can re-install the tire on the car and torque the lug nuts to the proper tightness. Then, simply lower the car back down and you are good to go!
A leaky tire bead can be a real nuisance, but it is nothing that cannot be fixed. With a little bit of time and effort, you can have your car back on the road in no time.
Q: How Do You Stop a Beaded Tire From Leaking?
There are two types of bead damage:
1. The bead is damaged on the inside. This type of damage is caused by the rim of the wheel rubbing against the bead.
2. The bead is damaged on the outside. This type of damage is caused by the tire hitting something on the road.
If the bead is damaged on the inside, it can usually be fixed by a professional. If the bead is damaged on the outside, it is usually not possible to fix it.
Q: How Do You Seal Bead ATV Tires?
Bead sealing is a process that helps to keep the air in your tires and prevent leaks. Bead sealing is the process of sealing the gap between the tire and the rim of the wheel. This is important because it prevents air from escaping, which can lead to a flat tire. It is a simple process that can be done at home with a few supplies. Steps:
- Clean the bead area of your tires. You can do this with a brush and soap, or you can use a cleaner specifically designed for cleaning tires.
- Once the bead area is clean, you will need to roughen it up so that the sealant will adhere to the tire. You can do this with sandpaper or a wire brush.
- You will need to apply the sealant to the bead area. There are a few different types of sealant, but the most common is latex-based. You can apply the sealant with a brush or a roller. Once the sealant is applied, you will need to let it dry for at least 24 hours.
- After the sealant has dried, you will need to inflate your tires. You can do this with a tire pump or an air compressor. Once the tires are inflated, you will need to check the pressure to make sure that the sealant is holding.
If you find that the sealant is not holding, you can reapply it. You can also add more sealant if you think that it is necessary. Once you have sealed your bead ATV tires, you should check the pressure regularly to make sure that the sealant is still holding. You should also check the tires for leaks. If you find a leak, you can either patch it or replace the tire.